
Protecting Your New Beverly Hills System After Installation
You are sitting in your living room, enjoying the quiet, steady hum of freshly cooled air circulating through your home. The air smells clean, the temperature is perfectly balanced, and the sticky heat of a Southern California afternoon is locked safely outside. After investing in a premium home comfort system, that initial feeling of relief is unmatched. However, the choices you make during these first few weeks of ownership will directly dictate how long that pristine performance actually lasts.
Many homeowners assume that a brand-new system is entirely self-sufficient. In reality, the early stages of a system’s lifespan are critical. Without proper baseline care, fine plaster dust from recent renovations, airborne organic material, and outdoor debris can quickly degrade system efficiency. Knowing how to maintain a new hvac system preserves your manufacturer warranty, prevents premature wear on sensitive electronic components, and keeps your monthly energy bills as low as possible. In a region where architectural demands and high-performance equipment meet, a proactive approach to care is the absolute best way to protect your physical and financial investment.
Before You Start: Post-Installation Essentials
Before diving into your ongoing maintenance routine, gather the essential documentation and tools required to manage your equipment. Keeping these items organized in a central location ensures you never scramble during a scheduled tune-up or warranty inquiry.
- The Manufacturer Owner’s Manual: This contains your specific model number, electrical specifications, and exact filter dimensions.
- Warranty Registration Confirmation: Most major brands require registration within 60 days of installation to unlock the full ten-year parts warranty.
- High-Quality Replacement Filters: Keep at least two spare filters on hand that match the exact MERV rating recommended by your installer.
- A Dedicated Maintenance Log: A simple physical notebook or digital spreadsheet to track filter changes, visual inspections, and professional service dates.
- A Soft-Bristled Brush and Garden Hose: Used exclusively for gently clearing the external perimeter of your outdoor condenser unit.
If you have recently completed a major home remodel or a comprehensive beverly hills ac installation, taking these initial steps immediately after the technicians depart will keep your system running like the day it was turned on.
Step 1: Verify and File Your Manufacturer Warranty
The very first step after your system is successfully commissioned is ensuring your warranty is fully active. Most manufacturers offer a generous parts warranty, but it is almost always contingent on rapid registration. If you fail to register the equipment online within the specified window (often 60 days), the warranty may automatically default to a much shorter five-year period.
Locate the serial numbers on both your indoor evaporator coil and your outdoor condenser unit. Visit the manufacturer’s official registration portal, enter these numbers along with your installation date, and print out the confirmation certificate. Store this certificate alongside your original installation invoice. This paperwork is your shield against unexpected component issues down the line.
Step 2: Establish a Strict Filter Replacement Schedule
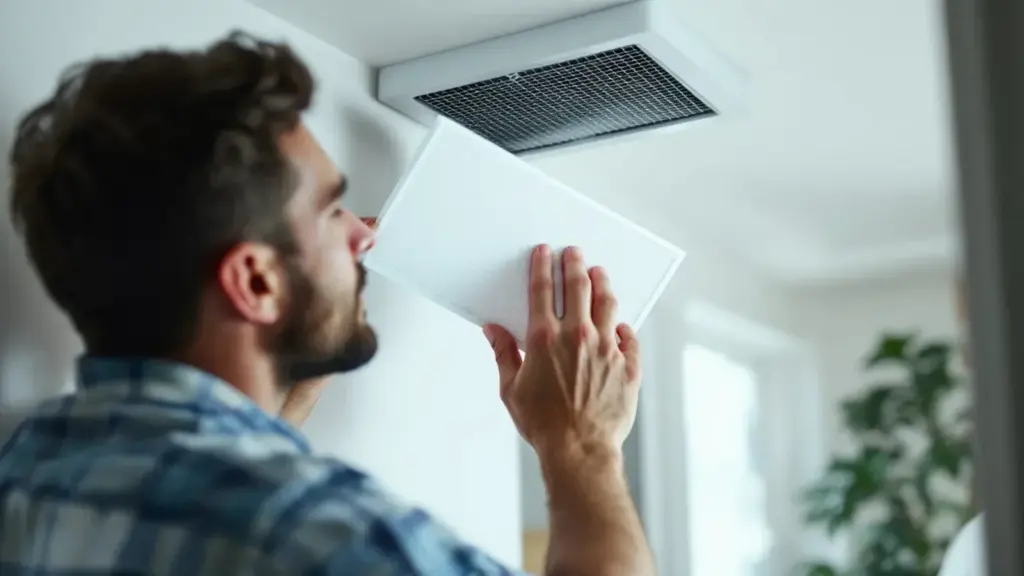
A clean air filter is the single most important factor in maintaining proper system airflow. When a filter becomes choked with dust, pet dander, and household fibers, your new blower motor has to work twice as hard to pull air through the system. This extra strain leads to elevated energy usage and can even cause your indoor coils to freeze over.
For the first three months, check your filter every thirty days. Simply slide it out of the return air grille or the dedicated media cabinet and hold it up to a bright light. If you cannot see light passing through the mesh, it is time for a replacement. While many standard filters claim to last up to three months, homes with pets, active families, or nearby construction projects often require monthly changes to maintain optimal indoor air quality.
Step 3: Maintain the Outdoor Condenser Clearance Zone
Your outdoor condenser unit is responsible for releasing the heat extracted from inside your home. To do this efficiently, it requires a constant, unobstructed flow of ambient air. When landscaping, leaf litter, or storage items crowd the unit, heat gets trapped, forcing the compressor to run hotter and consume more electricity.
Maintain a clear perimeter of at least two feet around all sides of the condenser unit. Trim back low-hanging branches, ornamental shrubs, and creeping vines. Additionally, ensure there is at least five feet of vertical clearance directly above the fan discharge. Periodically check the base pad to make sure autumn leaves, mulch, or blown trash have not accumulated against the coil fins.
If you want it handled correctly the first time, consider professional our services in Beverly Hills.
Step 4: Clean the External Condenser Fins Gently
Over time, outdoor dust, pollen, and lawn clippings can coat the delicate aluminum fins of your condenser. This fine layer of grime acts as an insulating blanket, reducing the unit’s ability to shed heat. Cleaning these fins annually prevents thermal stress on your compressor.
Turn off the power to the outdoor unit at the dedicated disconnect box. Using a garden hose equipped with a gentle spray nozzle (never use a high-pressure pressure washer, as this will instantly bend and ruin the delicate aluminum fins), wash down the exterior of the unit. Direct the water spray downward to flush away accumulated dirt. If you notice any bent fins, a professional can use a specialized fin comb to restore proper alignment during your next scheduled visit.
Step 5: Inspect and Clear the Condensate Drain Line
As your air conditioner cools your home, it actively removes moisture from the air. This moisture condenses on the indoor coil and drips into a drain pan, where it is routed outside through a dedicated PVC drain line. Over time, algae and mold can take root in this warm, damp pipe, eventually causing a clog that can back up and damage your ceilings or floors.
Locate the access point on your indoor drain line, which often features a simple T-shaped cap. Pouring a cup of plain warm water or white vinegar down the line every few months helps keep the interior walls of the pipe free of organic buildup. If your system is equipped with a safety float switch, verify that the wiring remains secure; this device is designed to instantly shut down your system if a water backup is detected, preventing costly property damage.
Step 6: Monitor Your Smart Thermostat Settings
Modern HVAC systems rely heavily on advanced thermostat logic to manage variable-speed blowers and multi-stage compressors. If you upgraded to a smart or programmable thermostat during installation, taking the time to set up customized schedules will prevent unnecessary system cycling.
Avoid drastic temperature swings, such as turning the system completely off during the day and then forcing it to drop fifteen degrees when you return home. Instead, program moderate setpoints that keep the home within a comfortable baseline, preventing the compressor from running at maximum capacity for hours at a time. If you want to customize your indoor environment further, you can explore specialized configurations as discussed in our guide on home comfort zoning options.
Step 7: Keep All Indoor Supply and Return Vents Open
There is a common misconception that closing vents in unused rooms saves energy. In a modern, balanced system, closing vents actually disrupts the engineered airflow balance. This increases the static pressure inside your ductwork, which can damage your blower motor and cause air leaks to develop in your duct seams.
Walk through your home and ensure that all supply registers and return air grilles are completely open and unobstructed by heavy drapes, furniture, or rugs. Keeping the pathways clear ensures the system can distribute conditioned air evenly, maintaining a consistent thermal balance throughout your entire floor plan.
The Beverly Hills Local Climate and Structural Factor
Many Beverly Hills homeowners rely on expert our services in Beverly Hills for exactly this.
Maintaining high-performance HVAC equipment in Beverly Hills requires an understanding of the local environment and architecture. Homes in this zip code range from sprawling mid-century estates to historic Spanish revivals, often featuring intricate plasterwork, custom millwork, and unique structural layouts. Preserving these architectural details requires precise humidity control, as sudden swings in indoor moisture levels can damage delicate plaster, warp hardwood floors, and affect fine art collections.
Additionally, our local climate features a mix of warm daytime temperatures followed by cool, damp coastal breezes rolling in from the Pacific during the evening. This daily temperature shift, combined with seasonal Santa Ana winds that carry fine dust and brush debris from the surrounding canyons, places a unique physical demand on your system. Filters clog more rapidly during windy periods, and outdoor condenser coils can quickly become coated in fine dust. Keeping up with a consistent maintenance routine is essential to keep these environmental elements from compromising your home’s air quality and system efficiency.
When to Call a Professional in Beverly Hills
While basic maintenance like changing filters and clearing outdoor debris is perfectly safe for homeowners to handle, complex mechanical and electrical tasks must be left to licensed professionals. Modern cooling systems utilize pressurized refrigerants, high-voltage electrical circuits, and sophisticated control boards that require specialized diagnostic tools.
You should schedule professional service immediately if you notice any of the following warning signs:
- Strange mechanical noises, such as grinding, squealing, or persistent rattling from either unit.
- Ice forming along the brass refrigerant lines or on the indoor evaporator cabinet.
- Frequent “short-cycling,” where the system turns on and off rapidly without reaching your set temperature.
- A sudden, unexplained spike in your monthly utility costs without an accompanying change in your usage habits.
To keep your system running safely and to maintain your manufacturer’s warranty standing, you should schedule a comprehensive professional inspection at least once a year. When you need expert eyes on your system, reaching out for certified air conditioning service is the safest way to guarantee long-term reliability.
Frequently Asked Questions
Can I use a high-efficiency MERV 16 filter in my new system?
While high-MERV filters capture smaller airborne particles, they also present greater resistance to airflow. If your system was not specifically designed to handle the static pressure of a MERV 16 filter, using one can restrict air movement, stress your blower motor, and lower system efficiency. Always consult your installation team or the manufacturer manual before upgrading to an ultra-high-efficiency filter.
How often should my new air conditioning system be professionally serviced?
You should have your system professionally serviced at least once a year, preferably in the spring before the peak cooling season begins. Regular professional maintenance is not just about cleaning; it is often a strict requirement to keep your manufacturer’s parts warranty valid over its ten-year lifespan.
Why is water pooling around my indoor HVAC unit?
Water pooling near your indoor equipment usually indicates a clogged condensate drain line, a cracked drain pan, or a malfunctioning condensate pump. Turn off your system immediately to prevent water damage to your home, and contact a licensed technician to clear the blockage and inspect the drainage system.
Maintaining Your Long-Term Comfort
Protecting a new mechanical system is all about consistency. By taking a few moments each month to inspect your air filters, clear away outdoor debris, and monitor how your system cycles, you protect the mechanical integrity of your investment. These simple habits prevent minor wear from cascading into costly premature repairs, ensuring your home remains a cool, inviting oasis for years to come.
When you are ready to set up a worry-free professional maintenance plan, or if you need an expert to inspect your system’s performance, the team at Smart HVAC System of Beverly Hills is here to help. Reach out to us today to schedule your next precision tune-up and keep your home comfort system running flawlessly.